If you have been looking to build a new pool, you’ve probably noticed that there are a lot of choices out there.
Perhaps more than you originally anticipated.
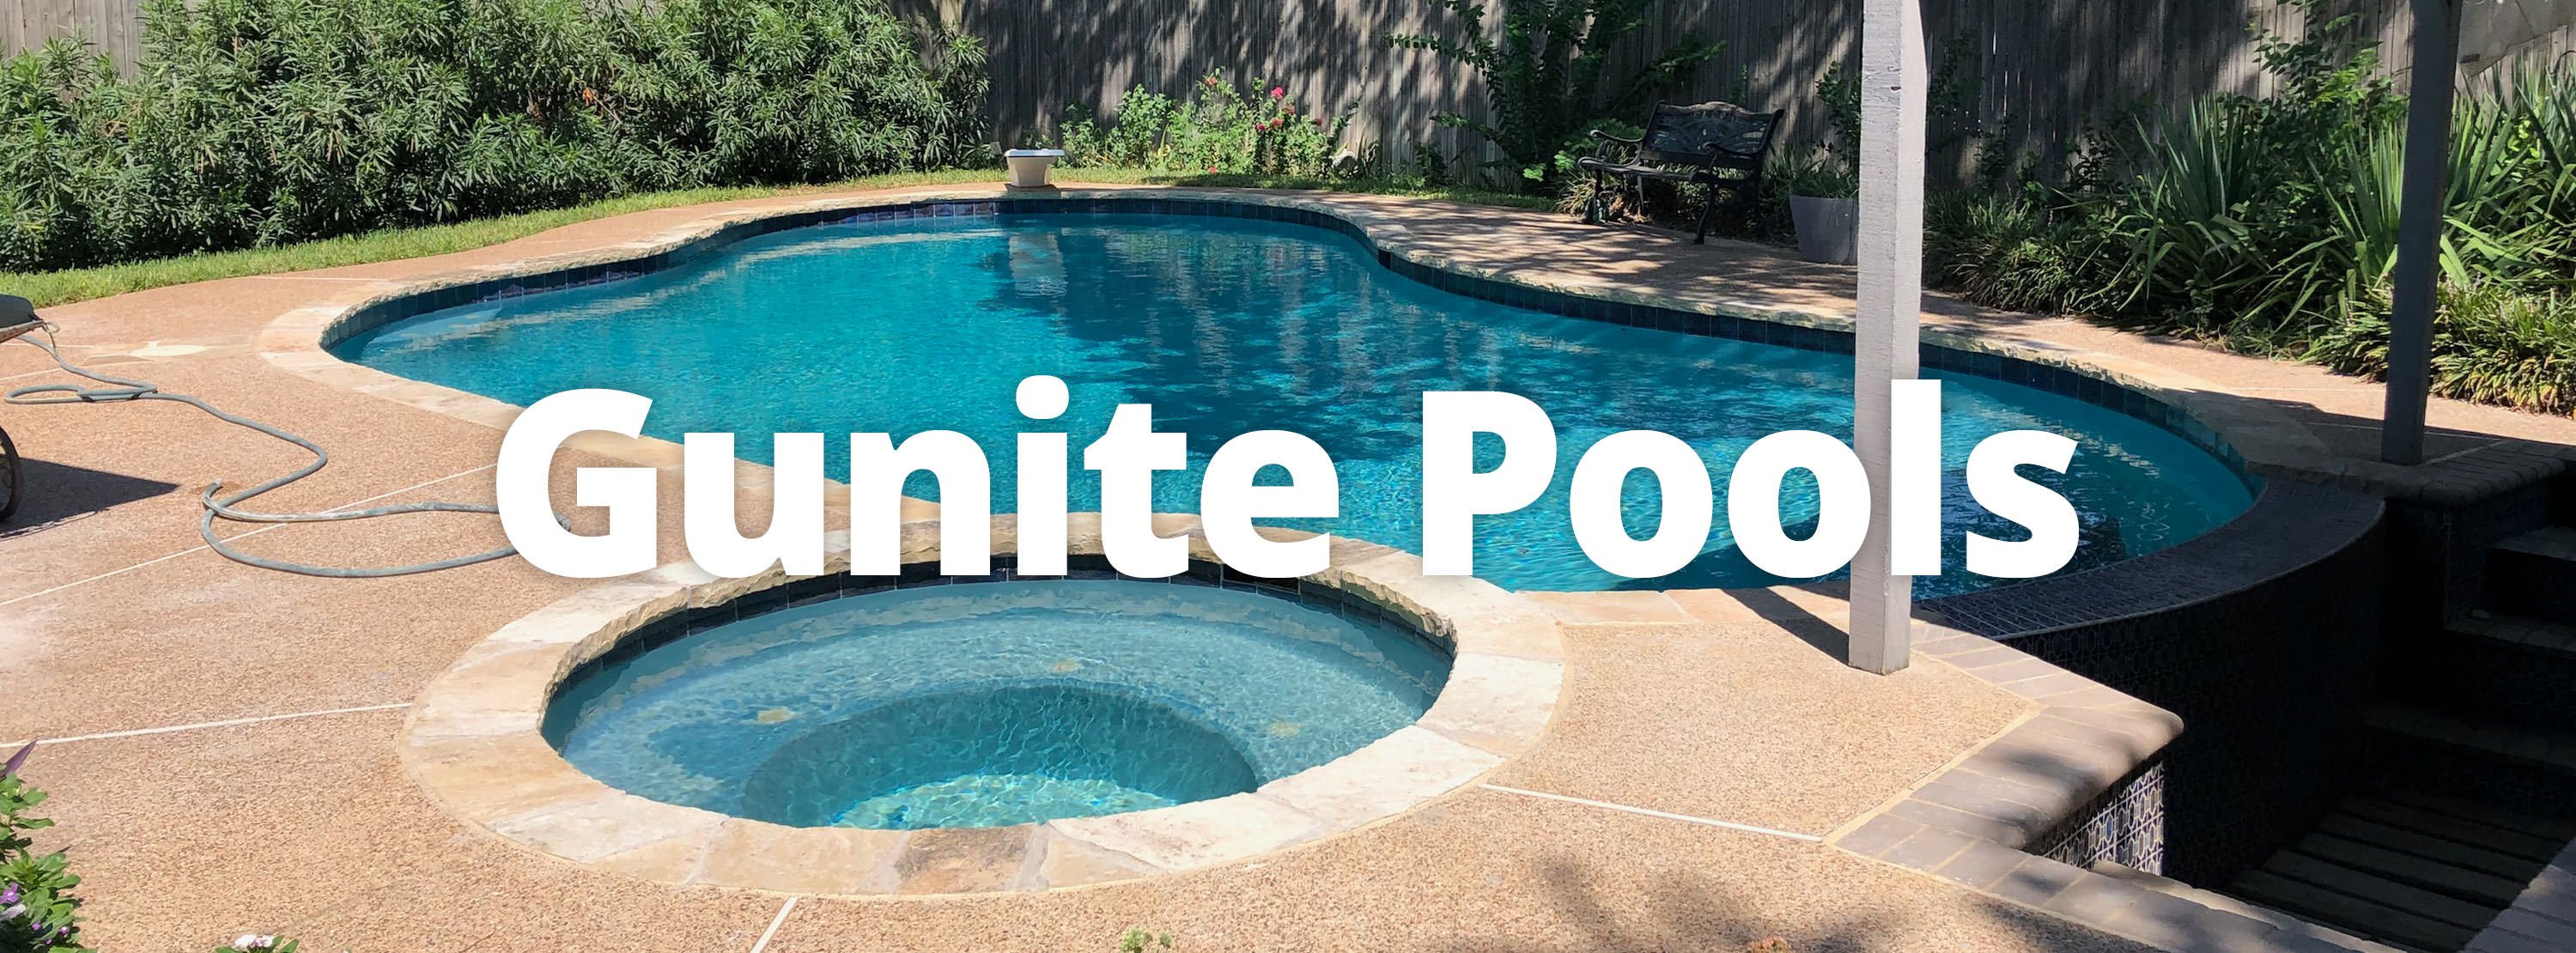
The most popular type of material to build a pool is concrete. Concrete pools are durable, long lasting, and made to fit any shape or size.
There are two main types of concretes used for swimming pools: gunite and shotcrete.
Now you are probably asking what is gunite and how is gunite different than shotcrete?
This article will answer these questions.
In this article, we will discuss the difference between gunite and shotcrete, cover some of the pros and cons to gunite, discuss how a gunite pool is constructed, and how to repair a gunite pool.
If you are interested in how much a pool costs to build, please see our previous post on in-ground pool installation costs.
Gunite versus Shotcrete
We’ve established that gunite and shotcrete are both types of cement used in the creation of in-ground swimming pools. Many pool companies will actually use the term gunite to refer to all concrete swimming pools, but there is a difference.
It is essential to make sure that your pool builder is experienced and knows the difference between gunite and shotcrete.
Gunite and shotcrete are both dryer forms of concrete that are sprayed onto a surface. The main difference between the two has to do with when the water is added.
Shotcrete comes pre-mixed with water. The pre-mixed concrete is added to a hopper, sent through a hose with high pressure, and dispensed onto the surface.
Gunite is different because the water is not added until the last minute before the concrete is dispensed onto the surface. The dry mixture of sand and cement are inserted into the hopper and sent down the hose in the same way as shotcrete.
However, when the dry mixture reaches the end of the hose the water is added before leaving the spout and covering the surface.
With both gunite and shotcrete, the pressure from the hose compresses the ingredients which allow it to stick to the surface and then expand.
Now that you have a better understanding of the difference between gunite and shotcrete, we will take a look at the steps it takes to build a gunite pool.
Pros and Cons of Gunite
Building an in-ground pool can take up to several weeks and even months to complete depending on the size. One of the main advantages to gunite is that you can stop the application, return the next day, and continue spraying without creating cracks or odd-looking finishes.
Because gunite is dispensed at such a great force, the new will bond to the old without creating a cold joint.
Unlike fiberglass pools, gunite pools can be made on-site which allows for more flexibility and is easier to install.
Gunite pools are incredibly durable and do not require a liner. This allows the pool to look better and retain its shape over time.
One of the main disadvantages of a gunite pool is the time it takes to install the pool from start to finish.
Gunite pools that are not tiled can sometimes seem rough to young children and have been known to snag a swimsuit. The rough surface of an un-tiled gunite pool can also house algae, so additional algaecide is needed to keep the pool pristine. There are several pool finishes that can be applied to your pool that will vary in texture.
Building a Gunite Pool
Choosing the right location for your pool is very important. Factors like underground lines and pipes, large tree roots, and slope must all be taken into consideration. It is imperative to choose a knowledgeable pool contractor so costly mistakes are not made.
Once the correct location has been chosen, it is time to dig out the area. In most cases, the dirt and rocks removed will need to be hauled off.
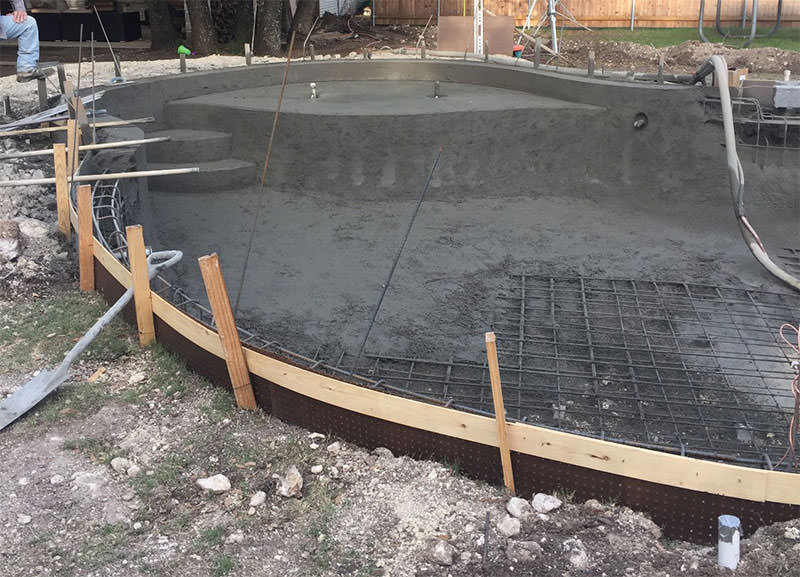
Once the area is excavated and the dirt smoothed, it is time to install the supports and install any plumbing.
A steel frame is installed next, covering the whole inside of the pool and shaped accordingly. This steel frame acts as the base for the pool and allows the gunite to adhere. The gunite is then smoothed out before it dries.
The next step is to install any tiles or decorative basin for the pool. If the pool is not tiled, a layer of plastering in the color you chose will be added on top of the gunite.
The decorative edge or coping around the pool is actually very important. It not only provides a smooth surface for entering and exiting the pool, but it also provides a lip for the water to remain in the pool. The decorative edge can be made from a variety of materials such as shaped concrete, stone, tile, or brick.
Outside of the edge around the pool, the ground must be leveled and pathed. The size of the paved area outside of the pool will vary based on your preferences. Some people enjoy a large paved area that acts as a patio to hold chairs, tables, and even fire pits.
Before the pool can be filled with water, the pump must be installed and all the plumbing and electrical hooked up. This is also the time when any additional water features and lighting will be installed.
By this point, the pool should be complete. The only remaining steps are to fill the pool and test the pump and any water features. You and your pool contractor can test chemical combinations and discuss any questions or issues about pool maintenance at this time.
Gunite Pool Surface & Crack Repair
Gunite pools are very durable, but over time, cracks in the concrete can form, plaster can deteriorate, and repairs need to be made. Pools can be costly additions, so it is essential to keep your pool looking and functioning at its best.
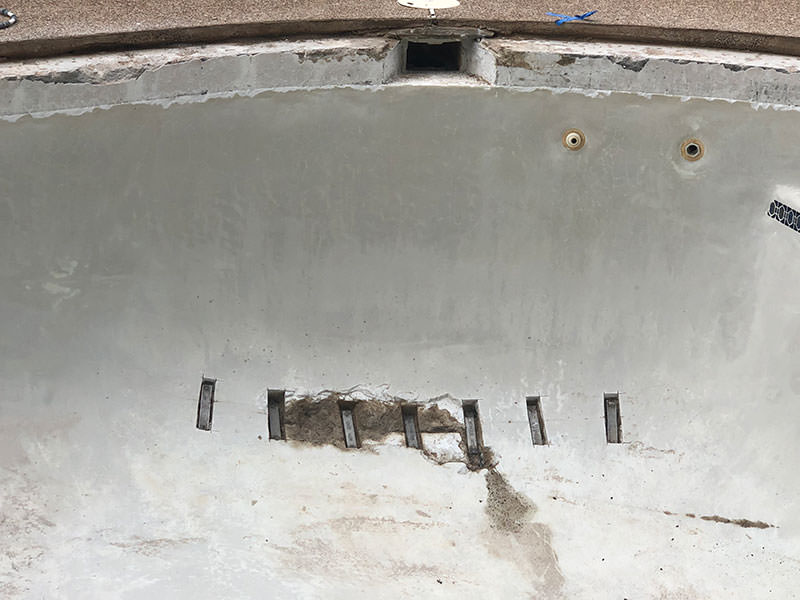
The two main types of repairs that may need to be done to your gunite pool are replastering and repairing cracks in the shell of the pool.
Just like a house with a slab foundation, a concrete pool can develop cracks. With time, pressure changes, temperature changes, earthquakes, and shifting soil can all cause cracks to form.
To fix a crack in a pool, the pool must be drained. It is best to work on a clean surface, so any debris or dirt will be removed before repairs begin.
Custom fabricated staples are used to hold the cracks together and prevent them from widening. After the staples are in place, layers of epoxy and bonding agents are used to seal and repair the cracks.
Once the cracks have been repaired, the pool will need to be re-plastered for a uniform look. Sometimes, the damage to your pool may not be as deep as the gunite, but only on the plaster.
In this case, your pool will just need to be resurfaced.
Chemicals in the pool water can cause the plaster to break down. The plaster basin may also crack and peel from frequent use or tree limbs falling during a storm.
Plaster comes in a variety of colors, so if you simply want to change the look of your pool and repairs are not needed, then replastering may be a good option for you.
Final Thoughts
To keep your pool in the best shape possible, remember that regular maintenance is vital. Having the proper chemicals and amounts can make a big difference in how long your plaster will last.
Also, be sure to clean the filter regularly because the motor can burn out if it becomes too clogged. Willsha Pools offers equipment repair and maintenance which can significantly help lower your cost if your pool equipment does malfunction or become damaged.
Now that you know all about gunite pools, we hope you will be able to make an informed and confident decision when deciding to build a pool.
A pool is a lifelong investment, so make sure you have any questions you have answered before beginning your pool project. We hope this article has helped set you on the right track and we are excited to help you build your dream backyard.
If you have further question, don’t hesitate to contact our team at Willsha Pools. If you have a pool or outdoor living project that you would like to discuss, please give us a call or fill out our free estimate form to get started today.